This is the method I have been working on to cut down a mini or micro sim to a nano sim size, together with pitfalls I found along the way.
Firstly,here is a nice template courtesy of Germer Consulting you can use for measuring: -

NOTE: Make sure you print the template the correct size (check against your SIM before you start cutting!)
WARNING! Cutting SIM cards is one thing, sanding them is another. This whole process could very likely kill your SIM card for good so attempt it at your peril and don't blame me if it goes wrong.
One good idea is to use any old SIM card you might have lying around to practice on first.
Step 1 - Writing
Write down the IMEI number from the back of your SIM. It's very easy to get carried away in the moment and just reach for the sand paper, but it makes sense to keep a copy of the IMEI number. You can get the number from the 'Settings' app on your iPhone of course, but not if you break it doing this :)

Step 2 - Cutting
You need a good, sharp pair of scissors. Some people suggest a sharp knife and a cutting board but the risk of the SIM slipping as you cut is very high, its a tiny thing and therefore hard to keep still.

Cut around the card to match the template above, leave about 0.8mm plastic showing along the top and bottom, about 0.3mm along the left side and around 1mm on the right side.
Finally, cut the bottom right corner and your done with step 2.

Step 3 - Sanding
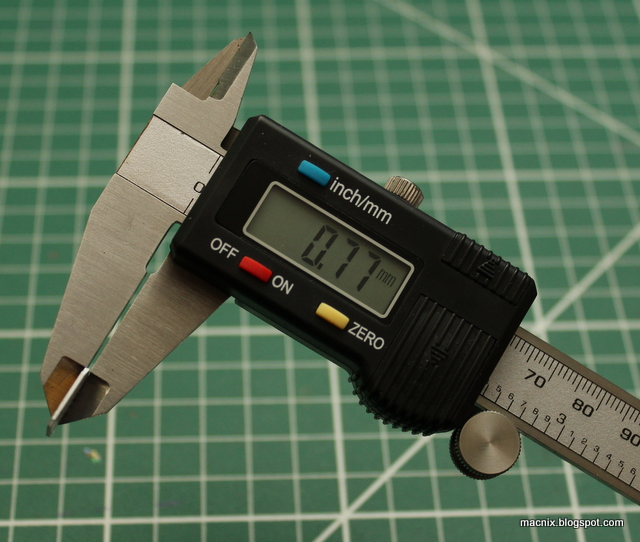
Here we go! It helps if you have a digital vernier caliper like the one below, they're pretty cheap to buy online, but if not, you can work by eye and make sure you stop when you start reaching the underside of the chip (see pictures below).
So, this pic shows the SIM at 0.77mm before I start, that is pretty close to the design thickness of 0.76mm.
The sand paper. First off, it's not sand, it's silicone carbide wet and dry paper, available from most hardware or vehicle repair shops (Halfords in this case).


The hardest part was ensuring the SIM was flat, and that the sanding was even, I used a piece of tape on the front of the card (the contact side) to give me something to pull the SIM smoothly over the sand paper.
I placed the index finger of my other hand on the center of the card to keep the pressure even as I pulled the SIM using the tape.
I did this a few times down the sheet of sand paper, stopping and checking thickness as I went.
I did this a few times down the sheet of sand paper, stopping and checking thickness as I went.

Eeek! I was initally worried when during a quick check, a faint circle had appeared on the back of the card, as you can see, the IMEI number has been completely worn away. This circle is the outline of the back of the actual SIM chip. If you continue sanding after this point, it is extremely likely you will damage the chip permanently.
When you can see the back of the chip, it's definately time to stop sanding.

The caliper is now reading 0.68mm, that is +0.01mm out from the design thickness of the nano SIM and given that my caliper was reading +0.01mm on the un-sanded SIM, should easily be close enough.
Bingo!

Summary
That's it you should have a working nano SIM, if not, oops, time to order a new, replacement SIM :D
No comments:
Post a Comment